From the field:
My first season, I caught defensive swarms in the Santa Barbara area. Bees packed my visor trying to get through. Zero stings all year thanks to the 3-layer suit. Start with full protection. You can always dial it back once you know what you're working with. And even if you end up with gentle stock, knowing you're fully protected gives you confidence, so when you do make a mistake or something unexpected happens mid-inspection, you can stay calm and finish what you're doing instead of having to walk away.
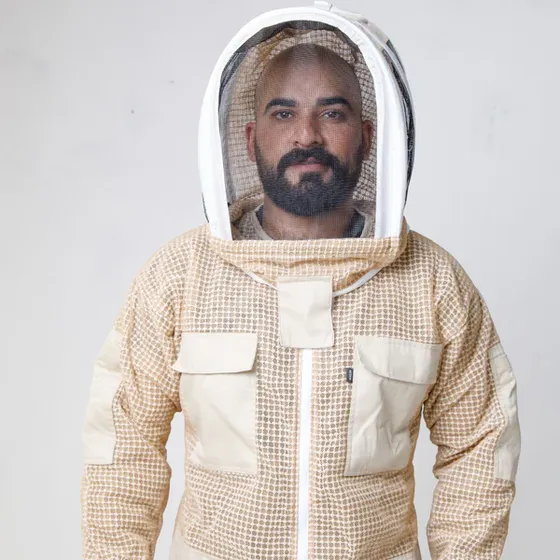
Full body coverage with built-in veil. A 3-layer ventilated suit keeps you cool and sting-free. This is the single most important purchase for your first year.
Start here.
Don't cheap out. A 3-layer suit means you can work confidently even with defensive bees. You can always downgrade to a jacket later once you know your bees' temperament.
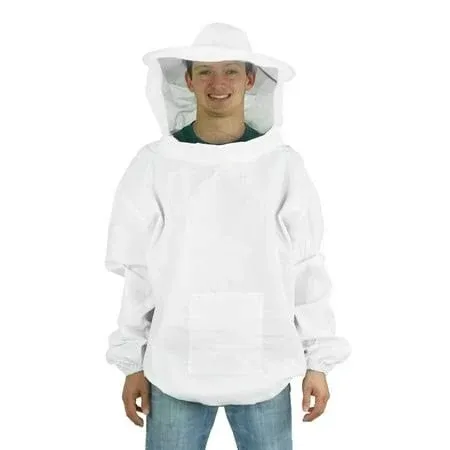
Upper body and head protection. Lighter and cooler than a full suit, but your legs are exposed. Better suited for beekeepers with known gentle stock.
Upgrade later.
Great for year 2+ once you know your bees are gentle. Not recommended as your only protection when starting out. You can't upgrade mid-inspection when 200 bees are on your veil.
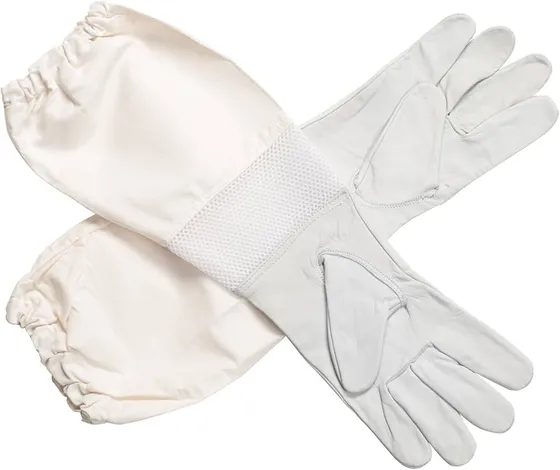
Long-cuff leather gloves that tuck into your suit sleeves. Good sting protection, less dexterity. Essential for defensive bees or when you're still building confidence.
Start here.
You'll take a few stings through them from hot bees, but nothing deep. Once you're comfortable handling your bees and confident reading their mood, switch to nitrile for better dexterity and frame feel.
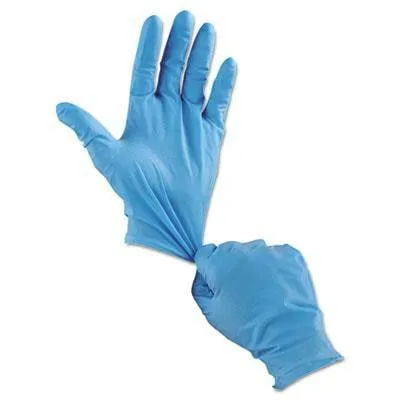
Get 5–6 mil thickness for the best balance of sting resistance and dexterity, or double up two pairs of 3 mil for a similar effect. Stick with powder-free in light colors (blue, purple, white). Dark gloves agitate bees. Disposable means no propolis buildup or alarm pheromone residue like leather gets over time. Buy in bulk, keep a spare pair in your pocket. They tear on frame edges.
When you're ready.
Switch to these once you feel comfortable handling your bees and can read their mood before you even open the hive. The dexterity difference is night and day for frame handling. No wrist protection though. Tuck long sleeves in.
Start with two hives.
Every experienced beekeeper will tell you the same thing: start with two. If one colony goes queenless or has problems, you can borrow a frame of eggs from the other to save it. With one hive, you have no backup, and losing your only colony in the first year is how a lot of people quit. Two hives also lets you compare: if one is thriving and the other isn't, you know something's off. The extra cost is worth it.
Plastic foundation? Buy beeswax.
If your frames come with plastic foundation, plan on buying unfiltered beeswax in bulk. From my experience, plastic foundation needs at least 2 extra coats of wax on top of what the manufacturer applies. Otherwise bees ignore it and build burr comb everywhere. Melt the wax and roll or brush it on. It's an extra step, but it saves you a mess later. A 10 lb block of unfiltered beeswax runs about $60 and will last you a long time.
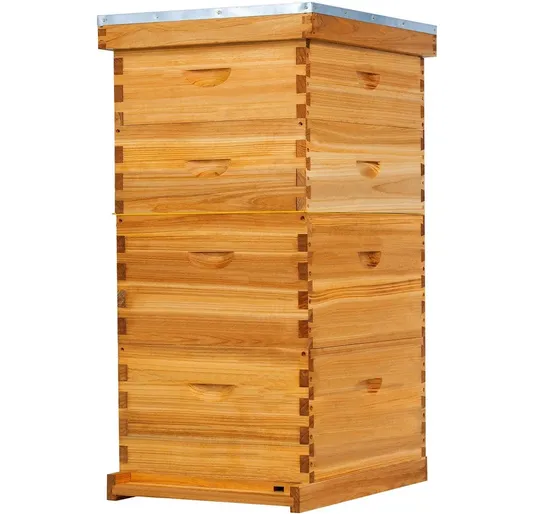
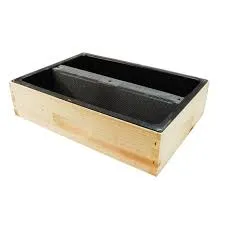
The standard. Get a kit that includes bottom board, 2 deep brood boxes, 1–2 medium honey supers, frames, inner cover, and telescoping outer cover. Buying the supers upfront with the hive is cheaper than adding them later.
Buy it all together.
Get a 10-frame Langstroth with honey supers included. Kits bundled together save you $30–50 vs buying separately. Parts are interchangeable, and your mentor will know how to help you.
From the field:
I bought one of these Amazon kits and it covered everything I needed except the smoker. The hive tool and brush are still going strong. The frame grip sits in a drawer. Worth it for the price. Just toss the smoker and get a proper stainless steel 4x7.
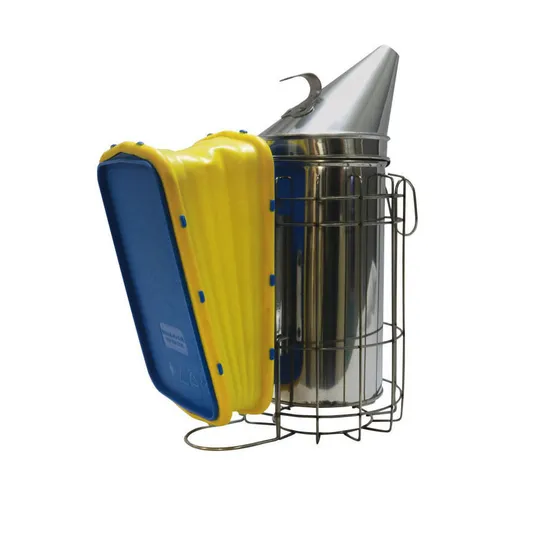
Calms bees during inspections by masking alarm pheromones. Get a stainless steel 4x7 with a heat shield and quality bellows. This is a tool you'll use every single time.
Don't buy the cheap one.
Amazon starter kit smokers are garbage. Bellows develop holes within months. Invest in a proper stainless steel smoker. Quality bellows are replaceable (~$18).
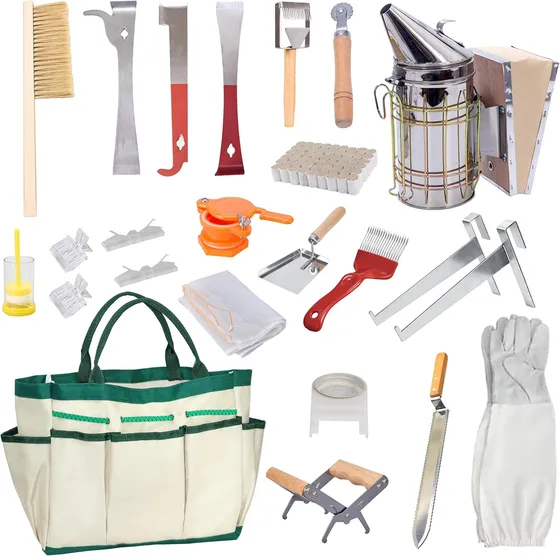
These 20–30 piece kits typically include a J-hook hive tool, bee brush, frame grip, queen marker, queen catcher clip, uncapping fork, and other accessories. Covers all the small tools you need in one purchase. Everything except the smoker holds up fine.
Just buy one of these.
The hive tool, brush, and queen marker work great. The frame grip and some extras you may never use, but at this price it's cheaper than buying tools individually. Just don't rely on the included smoker. Buy a real one separately.
From the field:
I learned the hard way. Entrance feeders triggered robbing on a weak colony. Frame feeders for new/small colonies, top feeder with super for bulking up strong colonies in fall. Both have a role. Entrance feeders? Water stations only.
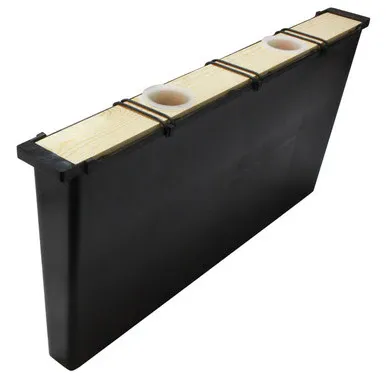
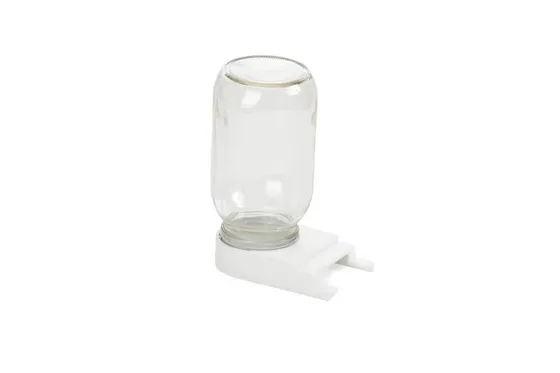
Replaces one frame in the brood box. Holds about a gallon of syrup right next to the cluster. Zero robbing risk since it's fully inside the hive. Perfect for packages, nucs, splits, and any weak colony that can't defend an external food source. Also doubles as a space filler in boxes that aren't full yet.
Your first feeder.
The safest way to feed. Get a cap-and-ladder style or stuff pine needles/sticks inside. Bees drown in smooth plastic feeders without something to grip. Leave it in the hive even when empty. Refill at dusk to avoid disturbing the colony.
Sits on top of the hive, holds gallons of syrup. Refill without opening the hive. No drowning, no robbing, high capacity. The endgame feeder.
Add when colonies are strong.
Use for late summer/fall bulking when colonies need high-volume feed fast. Refilling without opening the hive is a game changer. Get one with a super. Never looked back.
Jar-style feeder that slides into the hive entrance. Cheap and easy to see syrup levels from outside. Looks simple, but causes real problems.
Don't buy these for feeding.
They cause robbing. Other colonies and wasps can smell the syrup at the entrance and attack. If you already have them, repurpose as water stations in hot weather. Bees love them for that.
This is not optional.
Varroa mites will kill your colony if left untreated. Every hive has them. It's not a matter of "if". It's "when." New beekeepers often skip treatment because their bees look fine, then lose everything over winter. Have treatment on hand before your bees even arrive.
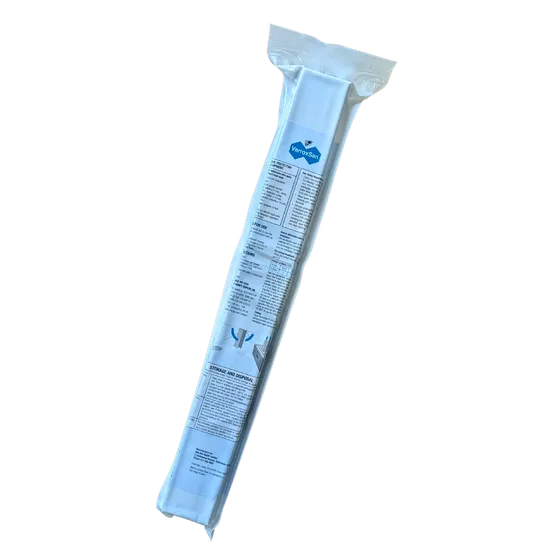
Pre-made OAV strips (like Varroxan or similar) are the easiest way for beginners to treat varroa. No special equipment needed. Just place the strips between frames. Effective, affordable, and approved for use with honey supers off. Best applied in broodless periods or late fall/early spring when mite levels spike.
Buy before your bees arrive.
OAV strips are the simplest and most beginner-friendly treatment. No vaporizer, no respirator, no mixing. Follow the instructions on the package. Your bees' survival depends on treating for varroa. This is the easiest way to start.
Tip: storing unused strips.
You won't use all 20 strips at once. Keep the unused strips in the original pack, seal it with a bulldog clip, put it in a ziplock bag, and store in a cool dark place. They'll keep fine for later treatments.
Minimum Viable Budget
3-layer ventilated suit
$80 – $150
Leather gloves
$15 – $30
Complete Langstroth hive (with supers)
$200 – $350
Smoker (stainless steel 4x7)
$30 – $50
Tool kit (Amazon)
$25 – $40
Frame feeder
$8 – $15
OAV strips (varroa treatment)
~$37
Bees (nuc or package)
$150 – $200
Total (first hive)
$545 – $875
Money saver:
Check Facebook Marketplace and your local bee club for used equipment. Many beekeepers sell quality gear at half price. Just make sure used hive components are clean and disease-free. Ask the seller about their hive history. Your bee club can help you inspect used equipment.